Tag: affordable web hosting

  • AI-Powered Affordable Web Hosting for Business Growth

    AI-Powered Affordable Web Hosting for Business Growth

    In today’s digital age, having a strong online presence is essential for any business to succeed. A key part of this is choosing the right web hosting service. Affordable Web hosting is like renting space on the internet where your website lives, and just like in real life, the location and quality of that space can make a big difference. Affordable Web Hosting services are great for businesses on a budget, but what if you could get even more value? This is where Artificial Intelligence (AI) steps in, making web hosting not only more affordable but also smarter and more efficient.

    Improved Website Performance

    AI helps improve your website’s performance by automatically optimizing various aspects. For instance, AI can analyze traffic patterns and predict high traffic times. During these peak periods, AI can allocate more resources to your website, ensuring it runs smoothly without any slowdowns or crashes. This means your customers have a better experience, leading to more sales and better customer satisfaction. Additionally, AI can compress images and optimize code on your website to make it load faster, which is crucial because a fast-loading site keeps visitors engaged and reduces bounce rates.

    Enhanced Security

    Security is a top concern for any business, especially when it comes to affordable web hosting. AI helps in protecting your website from cyber threats by constantly monitoring for any suspicious activity. If AI detects something unusual, like a hacking attempt, it can take immediate action to protect your site. This includes blocking malicious IP addresses, identifying potential vulnerabilities, and even predicting future threats based on patterns. This proactive approach helps keep your website safe, which is essential for maintaining customer trust and safeguarding your business’s reputation.

    Efficient Resource Management

    With AI, affordable web hosting becomes more efficient in terms of resource management. AI can monitor your website’s performance and adjust resources like bandwidth and storage based on real-time needs. For example, if your website suddenly experiences a spike in traffic due to a sale or promotion, AI can automatically allocate additional bandwidth to handle the extra visitors. This not only ensures your website remains fast and responsive but also helps in reducing costs since you only pay for the resources you use.

    24/7 Customer Support

    AI-powered chatbots provide round-the-clock customer support for your affordable web hosting service. These chatbots can answer common questions, troubleshoot issues, and even guide users through complex tasks. This means that even if you face a problem at odd hours, AI is there to help, ensuring that your website remains up and running. The quick and efficient support provided by AI reduces downtime, which is crucial for any online business.

    Automated Backups and Updates

    Regular backups and software updates are vital for the health of your website. AI takes the hassle out of this by automating the process. AI can schedule regular backups and store them securely, so you always have a copy of your website’s data in case something goes wrong. Similarly, AI can handle software updates, ensuring your website is always running on the latest and most secure version. This reduces the risk of bugs and security vulnerabilities, giving you peace of mind.

    Cost-Effective Solutions

    One of the biggest advantages of AI in affordable web hosting is cost-effectiveness. AI automates many tasks that would otherwise require manual intervention, reducing the need for a large IT team. This means lower operational costs, which translate into more affordable hosting packages for businesses. Furthermore, AI’s ability to optimize resources means you’re not overpaying for unused capacity, making affordable web hosting more economical.


    Conclusion

    AI is transforming affordable web hosting services by making them smarter, more efficient, and more secure. By leveraging AI, businesses can ensure their websites perform at their best, providing a seamless experience for visitors while keeping costs down. As AI technology continues to evolve, we can expect even more innovative solutions that will further enhance the value of web hosting services, helping businesses of all sizes to grow and thrive in the digital world.

  • MySQL Database Solution with Excellent Web Hosting

    MySQL Database Solution with Excellent Web Hosting

    Web hosting is the foundation for any online presence, whether it’s a simple blog, an e-commerce site, or a complex web application. As businesses grow and their needs become more sophisticated, the demand for robust database solutions also increases. MySQL, an open-source relational database management system, is a popular choice for many web hosting environments due to its reliability, scalability, and ease of use. For those looking to support unlimited MySQL Database on their hosting accounts, there are several considerations and best practices to ensure optimal performance and management.

    Choose the Right Hosting Plan

    Selecting a web hosting service that allows for endless MySQL databases is the first step towards supporting them. While some hosting providers offer infinite databases, others impose restrictions on users according to the amount of CPU, RAM, and storage they utilize. In this regard, shared hosting plans are typically less versatile than dedicated servers, cloud hosting, and VPS (Virtual Private Server) hosting.

    It’s crucial to consider all of the resources accessible while selecting a plan. A hosting service may promise infinite databases, but for a database to operate effectively, it needs a specific number of server resources. Should the hosting plan be insufficient in terms of CPU power, memory, or storage, your databases’ performance may need to improve.

    Optimize Database Performance

    Performance optimization must be carefully considered while supporting an infinite number of MySQL databases. Here are some helpful strategies:

    Indexing: Correct table indexing can greatly expedite the retrieval of data. You can make sure that your databases function well even when they are under a lot of stress by cutting down on the time it takes to find data.

    Query Optimization: Write SQL queries that are optimized to cut down on pointless computations. This may entail making the most use of joins, eliminating subqueries whenever feasible, and making sure your queries are as simple as possible.

    Connection Management: To cut down on the overhead of creating new database connections, use persistent connections. But be aware of any connection restrictions imposed by your hosting company.

    Caching: Put caching techniques in place to lighten the strain on your MySQL databases. Database queries can be reduced and speed can be improved by keeping frequently requested data in memory.

    Regular Maintenance: To quickly detect and fix performance issues, carry out routine maintenance operations including clearing out unnecessary data, optimizing tables, and keeping an eye on database logs.

    Scalable Storage Solutions

    As the number of databases grows, so does the need for scalable storage solutions. Ensure that your hosting plan offers expandable storage or consider integrating cloud storage solutions like Amazon S3 or Google Cloud Storage to offload some of the data. Utilizing scalable storage ensures that your databases can grow without being constrained by physical disk space limitations.

    Security Best Practices

    The complexity of data security grows while managing several MySQL databases. The following are some crucial security procedures:

    User Privileges: Give each database’s users the proper permissions. Limit access using the least privilege approach and refrain from utilizing the root user for routine tasks.

    Regular Backups: To guarantee that all databases are routinely backed up, implement automated backup systems. For extra security, think about utilizing both off-site and on-site backups.

    Encryption: When sensitive data is in transit or at rest, encrypt it. MySQL offers built-in encryption features for storing data in your databases, and it supports SSL/TLS for secure data transfers.

    Monitoring and Alerts: Install monitoring software to monitor database activities. Alerts can be used to inform you of suspicious activities or possible security breaches.

    Efficient Database Management

    It can be difficult to manage a big number of MySQL databases. To make management more efficient:

    Database Naming Conventions: For ease of maintenance and to prevent confusion, give your databases distinct names.

    Automation Tools: For regular operations like backups, upgrades, and monitoring, use automation tools like scripts or database management software.

    Documentation: Keep detailed records of your user permissions, database setups, and maintenance plans. For troubleshooting and orienting new team members, this will be really helpful.


    Conclusion

    It is possible to support an infinite number of MySQL databases in a web hosting environment with the appropriate preparation, tools, and administration techniques. Through the selection of an appropriate hosting package, performance optimization, implementation of scalable storage, strong security, and effective database management, you can build a strong and adaptable infrastructure that can handle the demands of your expanding online business. These best practices can help you get the most of your MySQL databases and make sure they run effectively at scale, regardless of the size of your company.

  • Bandwidth’s Role in Affordable Web Hosting Service

    Bandwidth’s Role in Affordable Web Hosting Service

    When it comes to affordable web hosting, bandwidth is a crucial factor that plays a significant role in determining the performance, accessibility, and overall cost-effectiveness of a website. Understanding how bandwidth works and its impact on affordable web hosting can help businesses and individuals make informed decisions about their hosting needs.

    Understanding Bandwidth in Web Hosting

    Bandwidth in web hosting refers to the amount of data that can be transferred between your website and its users over a specific period, usually measured in gigabytes (GB) or terabytes (TB) per month. This data transfer includes everything from loading web pages, downloading files, streaming videos, to any other activities that involve the exchange of information between your server and the users’ devices.

    Think of bandwidth as a pipeline that carries data. The wider the pipeline, the more data can flow through it at any given time. If your website has limited bandwidth, it can only serve a limited number of visitors simultaneously before experiencing slowdowns or even downtime. Conversely, ample bandwidth allows your site to handle high traffic and large data transfers without any performance issues.

    The Role of Bandwidth in Website Performance

    One of the primary ways bandwidth helps a website is by ensuring smooth and fast performance. A website with sufficient bandwidth can efficiently handle a large number of visitors, especially during peak times. If your website frequently experiences high traffic, having enough bandwidth ensures that your visitors have a seamless browsing experience, with pages loading quickly and without delays.

    In contrast, insufficient bandwidth can lead to slower load times, buffering issues with media content, and even outages during traffic spikes. These issues can frustrate users, lead to higher bounce rates, and ultimately harm your website’s reputation and effectiveness.

    Scalability and Flexibility

    Smaller websites or those with little traffic may be able to get by with the restricted bandwidth that many affordable web hosting plans offer. But, as your website expands and draws more users, your bandwidth requirements will rise. To handle this increase without having to pay large additional expenses, you must have a hosting plan with expandable bandwidth alternatives.

    Numerous web hosts have flexible plans that let you increase your bandwidth whenever you need it. Because of its scalability, your website will be able to accommodate growing traffic and data requirements without requiring a total redesign of your hosting configuration. It also aids in preventing unforeseen expenses that can result from going over your allotted bandwidth.

    Cost-Effectiveness of Bandwidth in Web Hosting

    When it comes to affordable web hosting, bandwidth is a critical factor in determining the overall cost. Hosting plans with higher bandwidth typically come at a higher price, but they offer better performance and reliability. It’s important to balance your bandwidth needs with your budget to find a hosting plan that provides the best value for your website. For small businesses or personal websites, opting for a plan with sufficient bandwidth at a reasonable price can be a cost-effective solution. This allows the website to perform well under normal traffic conditions without overspending on resources that may not be needed. On the other hand, websites with higher traffic volumes, such as e-commerce platforms or media-rich sites, may benefit from investing in plans with more generous bandwidth allocations. Although these plans might be more expensive, the improved user experience and reliability they offer can lead to higher customer satisfaction and better business outcomes.

    Avoiding Bandwidth Overages and Additional Costs

    One of the risks associated with affordable web hosting is the possibility of bandwidth overages, where your website exceeds its allocated bandwidth. This can result in additional charges or even temporary suspension of your website, depending on the hosting provider’s policies. Monitoring your website’s bandwidth usage and choosing a plan that matches your traffic patterns can help avoid these issues. The hosting provider offers tools to track bandwidth usage in real-time, allowing you to adjust your plan or optimize your website to reduce data transfer. Compressing images, using content delivery networks (CDNs), and minimizing unnecessary data-heavy elements are some of the strategies to manage bandwidth effectively.

    Conclusion

    For affordable web hosting, bandwidth is essential since it affects the cost, scalability, and performance of your website. It is possible to guarantee that your website provides a dependable and seamless experience for your visitors without going over budget by assessing your bandwidth requirements and selecting a hosting plan that fits your demands and traffic volume expectations. The best possible balance between web hosting pricing and functionality can only be maintained by allocating the appropriate amount of bandwidth.

  • Step-by-Step Guide | Redirecting Your Website from HTTP to HTTPS

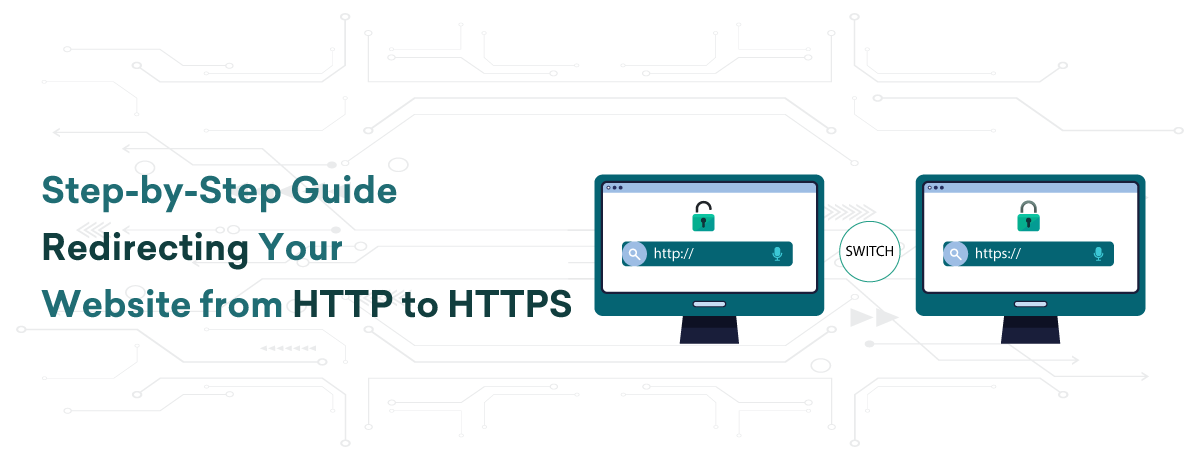
    Step-by-Step Guide | Redirecting Your Website from HTTP to HTTPS

    Using HTTPS (Hypertext Transfer Protocol Secure) to secure your website is essential for safeguarding user data, improving search engine rankings, and fostering visitor trust. Data transferred between the user’s browser and your server is encrypted via HTTPS, which makes it far more difficult for bad actors to intercept and misuse the data. Getting an SSL certificate, setting up your server, and changing your website’s settings are just a few of the procedures involved in switching your website from HTTP to HTTPS. You will be guided through the process of making this crucial shift by this step-by-step instruction.

    Get an SSL Certificate

    To start the process of switching your website from HTTP to HTTPS, you must first obtain an SSL certificate. An SSL Certificate allows encrypted connections and validates the legitimacy of your website. An SSL certificate is available from several sources:

    Certificate Authorities (CAs): Let’s Encrypt, Comodo, and DigiCert are a few examples of companies that offer SSL certificates. While some ask for a fee, others provide certificates for free.

    Hosting Companies: A lot of hosting companies include SSL certificates in their hosting packages or sell them as an add-on.

    After selecting a provider, create a Certificate Signing Request (CSR) and follow the provider’s instructions to get your SSL certificate.

    Installing the SSL Certificate

    Installing your SSL certificate on your web server is the next step after getting it. The installation procedure differs based on the hosting environment you are using:

    cPanel: To install the certificate, go to the SSL/TLS area, upload your certificate files, and then follow the instructions.

    Apache: To update the paths to your certificate files in your configuration files (usually httpd.conf or apache2.conf), you must restart the Apache server after making these changes.

    Nginx: To add the SSL certificate and key routes to a Nginx server, edit the server block in your configuration file and reload the server configuration.

    Modify the URL of Your Website

    Change the URL of your website to utilize HTTPS once your SSL certificate has been installed. This comprises:

    Content Management System (CMS): Change the site’s URL to use HTTPS if you are using a CMS such as WordPress, Joomla, or Drupal. This may be accomplished in WordPress by going to Settings > General.

    Hardcoded URLs: Make sure that all links, scripts, and images on your website that have hardcoded URLs use HTTPS. If a lot of the URLs on your website are hardcoded, you can use a plugin or script to automate this procedure

    Configure 301 Redirects

    Configure 301 redirects on your server to guarantee that all HTTP traffic is sent to HTTPS. This will notify browsers and search engines that your website has switched to HTTPS permanently. 301 redirect setup differs depending on the type of server you have:

    Apache: Add the following lines to your .htaccess file:-
    apache:
    RewriteEngine On

    RewriteCond %{HTTPS} off

    RewriteRule ^(.*)$ https://%{HTTP_HOST}%{REQUEST_URI} [L,R=301]

    Nginx: Add the following lines to your server block configuration:-
    nginx:
    server {

        listen 80;

        server_name yourdomain.com www.yourdomain.com;

        return 301 https://$host$request_uri;

    }

    Make Updates to Google Analytics & Google Search Console

    Update your Google Analytics and Search Console settings after switching to HTTPS:

    Google Search Console: Create a new property for your site’s HTTPS version and upload a new sitemap.

    Google Analytics: Make sure the new HTTPS URL is reflected in the property settings.

    Give Your Website an Evaluation

    Finally, make sure everything is working properly via HTTPS by thoroughly testing your website. Look out for:

    Mixed Content: Make sure that HTTPS is used to load all resources, including scripts, pictures, and stylesheets.

    Functionality: Verify that all of the forms and functions on the website function as intended.

    Check to make sure all HTTP pages properly reroute to their equivalent HTTPS pages.

    Conclusion

    You can effectively redirect your website from HTTP to HTTPS by following these instructions. This change improves the security of your website, safeguarding user information and fostering confidence. It can also raise your search engine rankings and give your visitors a more dependable, safe experience. Making the move to HTTPS is essential to ensuring that your website complies with current security requirements and keeps expanding.

  • BitNinja’s Remote Server Protection & Website Security

    BitNinja’s Remote Server Protection & Website Security

    Websites are essential entry points for businesses, services, and information in the digital age. But they are also easy pickings for online attacks, such as virus injections and data breaches. An inventive remedy has surfaced as the conflict between security and vulnerability intensifies: BitNinja‘s Intelligent Website Security.

    This blog post looks into the subject of automated website security and explains how BitNinja is transforming the way we safeguard digital properties.

    The Development of Website Security Management

    Modern websites need to be protected against cyber threats, and manual security procedures are no longer adequate. Currently, BitNinja and other automated security solutions have taken over. BitNinja’s cutting-edge technology combines AI-driven intelligence and real-time monitoring to safeguard websites against threats, eliminating the need for human intervention entirely. For website managers and owners, it offers fresh serenity.

    Important Elements of BitNinja’s Independent Website Defense

    Virtual Repairing: This feature finds and fixes vulnerabilities in the code of a website without the need for human participation. It fills the void between discovering a vulnerability and the duration required to implement a fix.

    Behaviour Assessment: Using artificial intelligence (AI), it examines user behavior on the website to spot odd trends or questionable activity. It makes it possible to identify and stop threats like account takeovers and brute-force efforts early on.

    AI File Searching: This tool uses cutting-edge AI capabilities to identify harmful files by shifting the malware scanner’s workload from your server to the cloud.

    Firewall for Web Applications (WAF): BitNinja’s Web Application Firewall (WAF) provides a resilient defense against a range of online threats, such as SQL injection and cross-site scripting (XSS). The WAF functions independently, using automatic ruleset updates, file incident analysis, and real-time threat adaptation to handle incoming traffic. It has been demonstrated to be more trustworthy than Imunify360 and cPGuard.

    Finding and Eliminating Malware: Automated malware detection makes sure that there is no dangerous code on your website. If a threat is found, it removes it quickly to protect both the reputation of your website and the security of its users.

    Management of Intellectual Property Reputation: It keeps an up-to-date list of malicious IP addresses, automatically preventing access from known attack sources and lowering the possibility of unauthorized access.

    Honeypot Port: To stop malicious port scans, it opens pre-configured honeypot ports.

    Web Honeypot: Instantly deployable honeypots that may be used to target vulnerabilities in CMSs (WordPress, Joomla, Drupal) and other platforms.

    DoS Identification: It has adjustable sensitivity DoS mitigation to identify and prevent TCP-based DoS attacks.

    Log Evaluation: Real-time analysis of log files from various log routes is used for intrusion detection and response, which enables the quick and simple identification of IP-blocking triggers such as invalid passwords and more.

    Protective Robot: With the help of this feature, malware may be automatically detected in real-time, allowing for the automatic blacklisting of malicious IP addresses and the detection of backdoors.

    Cleaner for Databases: Malware is detected in SQL databases via the Database Cleaner module. It is only identifying infections in a log-only mode to maintain stability.

    Sandbox Scanner: Using a PHP emulator, one may identify malicious files based on their behavior—even if they employ obscure obfuscation techniques.

    Automatic Website Security Benefits

    Constant Watchfulness: Because the automated system is always running, your website is always protected. By doing away with manual inspections and adjustments, it guarantees the security of your website even when you’re not actively keeping an eye on it.

    Immediate Threat Reduction: Promptly identifying and resolving security breaches minimizes the possible harm caused by attacks, decreasing downtime and maintaining the functionality of your website.

    Effectiveness and Dependability: BitNinja and other automated security solutions improve the effectiveness and dependability of website defense by doing away with human error and guaranteeing constant watchfulness.

    Handling Ease: Website managers may concentrate on other important duties when their website’s security is taken care of by an advanced, AI-driven system thanks to automated security.

    Conclusion

    BitNinja’s website security and remote server protection provide all-inclusive ways to protect your online presence. BitNinja protects your servers and websites from cyberattacks by combining cutting-edge security technologies, automated defences, and real-time threat detection. Because of its strong security, you can be more dependable and trustworthy while concentrating on your main business without having to worry about possible safety breaches. Select BitNinja for reliable protection against the constantly changing array of cyber threats and peace of mind.

  • Benefits of Choosing Windows VPS Hosting

    Benefits of Choosing Windows VPS Hosting

    Shared hosting plans are ideal for budding entrepreneurs, startups, and newbie bloggers. They are well-suited for websites with low traffic and minimal data, providing an affordable and straightforward hosting solution. However, as your website grows in traffic and data, upgrading your hosting plan becomes essential. Compared to shared hosting, a VPS hosting plan offers better performance by providing a dedicated OS, disk space, and higher bandwidth, ensuring an improved user experience.

    Now, let’s explore the benefits of a Windows VPS hosting plan over other hosting options available in the marketplace. But before we dive into the features, let’s understand what a Windows Virtual Private Server (VPS) is. Let’s get started.

    What is Windows VPS Hosting?

    VPS hosting that operates on the Windows OS is known as Windows VPS hosting. This offers users the advantage of a dedicated virtual server with greater control and resources compared to other hosting options. For businesses seeking secure hosting services with Windows-compatible technology and environment, VPS hosting with Windows OS is the ideal choice. For businesses accustomed to using Microsoft systems and tools to oversee various business operations, Windows VPS hosting stands out in its ability to efficiently manage the server.

    Benefits of Windows VPS Hosting

    Backup & Remote Support: In the digital realm, data is invaluable. Windows VPS hosting offers superior data security, regular backups, and round-the-clock remote support from experts, ensuring your data is safeguarded and readily recoverable in case of issues.

    Customized Solutions: Tailor your server to meet specific website needs with Windows VPS hosting. Customize features and allocate resources effectively to handle future demands with ease.

    Higher Reliability: Opting for Windows VPS hosting from a trusted provider in Kolkata ensures enhanced server security, comprehensive data backup, and system reliability. This plan helps prevent unauthorized access and mitigates the risk of malware attacks on personal and business data.

    Dedicated Resources: Windows VPS hosting provides full control over server resources unlike shared hosting. Regardless of traffic surges, your website’s loading time remains consistent, reducing bounce rates and enhancing user experience and satisfaction.

    Why Windows VPS Hosting is a Superior Choice?

    Choosing Windows VPS hosting offers a balanced blend of flexibility, performance, and security. Here are more reasons why this hosting plan is superior:

    Scalable Performance

    Improving website performance involves ensuring fast loading times and smooth operation for users. Opting for a VPS can enhance performance as it reduces the impact of other users on the server. Beyond this, VPS provides benefits like resource accessibility, increased storage, higher bandwidth, and updated technology, all of which can boost website traffic and speed.

    As your business grows, you can easily scale up resources by upgrading your VPS plan. Conversely, during downtimes, you have the flexibility to reduce technical resources. VPS eliminates the need for lengthy data transfers and complex hardware setups, offering a hassle-free experience.

    Moreover, when executing promotional campaigns on your website, such as paid ads or special offers to attract customers, VPS serves as a comprehensive solution to meet your needs.

    Robust Security

    Whether you are an individual or a large company, web hosting security is a major concern for anyone with an online presence. Stolen financial information, data loss, and compromised website content can have a direct negative impact on your business.

    To address these issues, VPS hosts your data files in a secure partition that is inaccessible to other clients, enhancing your data security. With root access to your server unlike shared hosting, you can implement advanced security measures for your server. This independent access to resources helps keep your data safe from other sources.

    For e-commerce businesses in particular, VPS or Dedicated Server Hosting can offer significant benefits. With a dedicated IP address, your website’s identity is unique, especially when providing features like email marketing and secure e-commerce transactions.

    In conclusion, the security provided by VPS can be compared to that of a Dedicated Server at a lower cost. Therefore, opting for VPS will protect your website and data from unauthorized access.

    Cost-Effective Solution

    VPS is the hybrid form of shared and dedicated hosting, offering ample resources at manageable costs. Choosing a Windows VPS allows you to easily scale server specifications as your website expands, making it a more cost-efficient choice than shared hosting. Moreover, scaling disk space and bandwidth to accommodate your site’s growth is effortless, eliminating concerns about server migration or plan changes.

    Unlike with Dedicated Server Hosting, where you must bear the significant expense of purchasing a physical server, with VPS, you only need to invest according to your requirements. 

    Administrative Control: 

    Windows VPS hosting offers extensive administrative control, allowing you to customize and optimize your server environment to meet your business needs. You can install any necessary software or applications, tailor server settings to enhance performance and security, and configure specific features for optimal functionality.

    With full administrative access, you can implement advanced security measures, manage user access, and schedule regular updates to protect your data. Efficient resource management ensures that critical applications receive the necessary CPU, RAM, and storage, maintaining consistent performance even during peak traffic times.

    Administrative control also allows you to set up and manage backup processes, ensuring quick data recovery in case of loss or system failure. Comprehensive monitoring tools keep you informed about server performance and potential issues, enabling proactive maintenance.

    As your business grows, administrative control ensures that you can easily scale your server resources, adding storage, bandwidth, or processing power as needed. This flexibility provides a future-proof solution, ensuring your server infrastructure evolves with your business.


    Conclusion

    Windows VPS hosting is a great option for businesses looking for improved control, performance, and security. While shared hosting suits startups and low-traffic sites, VPS hosting is crucial as your site grows. It provides top-notch data security, regular backups, and round-the-clock support, ensuring constant data protection and accessibility. Customization features enable efficient resource allocation and feature tailoring, maintaining consistent performance and high user satisfaction. Scalability allows easy resource adjustments as your business expands, with strong security measures to safeguard your data. Offering cost-effectiveness and benefits similar to a dedicated server, Windows VPS hosting provides extensive administrative control for optimal server management. This flexibility guarantees your server infrastructure can grow with your business, offering a reliable and scalable solution for expansion.

  • Power Up Your Business: India VPS Hosting for Small Businesses

    Power Up Your Business: India VPS Hosting for Small Businesses

    As technology advances, the demand for reliable web hosting services catering to businesses’ needs also increases. India VPS Server is a popular option that has experienced significant growth. Explore the world of VPS hosting and discover its advantages over traditional hosting options. By the end of this guide, you will know how to make an informed decision for your business’s hosting requirements.

    Understanding VPS Hosting

    Virtual Private Server (VPS) hosting is an advanced solution that bridges the gap between shared hosting and dedicated servers. In this setup, a single physical server is divided into multiple virtual servers, each operating independently with its own dedicated resources. This structure ensures that one website’s activities do not affect others’ performance, providing improved reliability and speed.

    Advantages of VPS Hosting

    VPS Hosting provides numerous benefits that make it a compelling choice for small businesses. The Indian VPS Hosting is a popular option that has experienced significant growth.

    Cost-Effectiveness and Affordability

    For small businesses with restricted budgets, cost-effectiveness is essential.VPS Server offers an affordable solution by enabling you to pay only for the resources you require. Unlike traditional dedicated servers, where you pay for the whole physical server, VPS hosting allows you to select a plan that fits your needs and budget.

    Improved Performance and Reliability

    India VPS Server guarantees enhanced performance and reliability through dedicated resources. Your website will not be impacted by other sites on the same server, providing a smooth user experience for your visitors.

    Scalability and Flexibility

    As your business grows, your hosting needs also increase. VPS Server provides seamless scalability, enabling you to enhance your resources as needed. This flexibility guarantees that your website can manage higher traffic and data without any interruptions.

    Full Root Access and Control
    A VPS Server provides full root access, allowing for complete control over your virtual server. This enables you to install custom software, adjust settings, and make necessary changes to meet your business needs.Improved Security

    Security is a paramount concern for every online enterprise. VPS Server provides isolated hosting environments, minimizing the risk of security breaches from neighbouring websites. Moreover, you can customize security measures to meet your unique requirements.

    Dedicated IP Address

    A dedicated IP address is included with a VPS Server, boosting your website’s SEO and credibility. It also guarantees that your website remains unaffected by the activities of other websites on the server.

    How Can VPS Servers Boost Business Performance?

    A business’s online performance is closely tied to its hosting infrastructure. Let’s delve into how VPS servers can greatly enhance your business’s performance and efficiency.

    Lightning-Fast Loading Speeds

    Page loading speed is a crucial element in user experience and search engine rankings. With the VPS Server’s dedicated resources, your website’s pages load quickly, decreasing bounce rates and boosting user retention.

    SEO-Optimized Setting

    Search engines, notably Google, prioritize websites with quick loading times and dedicated IP addresses. VPS Server satisfies both criteria, facilitating improved search engine ranking for your website.

    Reduced Downtime

    Downtime can harm any business, resulting in revenue loss and a tarnished reputation. India VPS Server’s strong infrastructure and redundancy tactics decrease downtime risks, guaranteeing constant website accessibility.

    Optimal Resource Allocation

    VPS hosting allows for precise resource allocation as needed. This efficient management ensures that your website runs smoothly even during traffic spikes, providing an uninterrupted user experience.

    Improved Data Security

    A VPS Server’s isolated environment ensures your data remains secure from potential threats. You have the option to enhance security by adding firewalls and encryption to protect your website from cyber attacks.

    Seamless Software Integration

    As your business grows, you may find the need to integrate multiple software and applications. VPS Server provides the flexibility to install and run various software without encountering any compatibility issues.

    Selecting the Right India VPS Hosting Provider

    Maximizing the advantages of VPS hosting depends on choosing the correct provider. Here are some key factors to consider when making your decision:

    1. Reliability and Uptime Assurance

    A dependable hosting provider must provide a strong uptime guarantee to maintain the constant accessibility of your website to users. Seek out providers offering uptime guarantees of no less than 99.9%.

    2. Customer Support

    Responsive and knowledgeable customer support is invaluable, especially during technical difficulties. Make sure your chosen provider offers 24/7 customer support to promptly address any issues.

    3. Data Center Locations

    Choose a hosting provider with data centers strategically located, preferably in India or near your target audience. This can decrease latency and enhance website loading speed.

    4. Performance Monitoring Tools

    Advanced performance monitoring tools enable you to monitor and analyze your website’s performance effectively, empowering you to make informed decisions for optimization.


    Conclusion

    India VPS Server is the perfect solution for small businesses aiming to build a strong online presence. Its enhanced performance, scalability, security, customization flexibility, and cost-effectiveness make it a compelling choice for businesses of all sizes. By selecting a reliable hosting provider with excellent customer support, strategically located data centers, and performance monitoring tools, you can unleash the full potential of VPS hosting for your business.

  • Upgrade Your Website Speed with SSD Linux VPS Hosting

    Upgrade Your Website Speed with SSD Linux VPS Hosting

    Upgrade Your Website Speed with SSD Linux VPS Hosting

    Website Hosting on Linux VPS Hosting SSD storage generally loads faster and performs better than those hosted on traditional HDD storage. SSDs have a lower failure rate, consume less power, and offer faster read/write speeds. Therefore, if you want a fast and efficient website, choosing SSD storage is the best.

    While both SSDs and HDDs perform similar tasks such as booting your system, storing your applications, and saving your files, there are some differences between the two types of storage. Let’s explore these differences below
    .

    HDD vs SSD

    HDD SSD
    It is crucial to conduct regular defragmentation of a hard drive due to the damaging impact of fragmentation on overall disk performance. This necessary process ensures optimal performance and should be noticed. It is important to note that the performance of SSDs remains unaffected by the process of fragmentation. Therefore, the practice of defragmentation is considered unnecessary for these devices.
    The access speed of typical HDDs is relatively slow, primarily due to the 5 to 10-millisecond data access time. Solid state drives (SSDs) Linux VPS Hosting are a preferred data storage solution due to their superior speed performance. The lack of mechanical seek time or latency associated with flash memory storage allows SSDs to achieve access times running from 25 to 100 microseconds. This is up to 100 times faster than traditional hard drives, making SSDs a reliable and efficient option for data storage in high-performance computing environments.
    The average boot-up time for a hard disk drive (HDD) is estimated to be around 45 seconds. It is worth noting that the average boot-up time for a Solid State Drive (SSD) is just 20 seconds. This information is valuable to those interested in the performance and speed of computing devices.
    The hard disk drive (HDD) operates at varying speeds determined by its rotatory mechanics. Data closer to the moving head is accessed at a faster rate due to the proximity of the data to the read/write head. Linux VPS Hosting Solid-state drives (SSDs) offer advantages over traditional hard drives, including faster read/write functions and noise-free operation. In addition, file transfers can be completed more quickly, making SSDs an ideal choice for businesses seeking to improve their overall computing performance.
    The performance of devices that use read/write operations is often slower than that of SSDs due to the involvement of moving parts. It’s important to consider this factor when determining the optimal storage solution for a given application. Linux VPS Hosting with SSD technology delivers superior read/write performance when compared to HDDs, due to the absence of moving parts. Data is retrieved directly from the storage, eliminating the need for mechanical delays associated with spinning disks.

    For businesses that prioritize speed and noise reduction, SSD Linux VPS Hosting packages are an excellent choice. While HDDs may offer a more cost-effective solution, their performance cannot match that of SSDs when it comes to lightning-fast response times and seamless browsing capabilities. Those seeking an affordable, yet high-performance hosting solution are encouraged to consider SSD Linux VPS Hosting.

    Conclusion

    Upgrading to SSD Linux VPS Hosting promises a significant boost in website speed and performance. By harnessing the power of solid-state drives and the flexibility of a virtual private server, businesses can enhance user experience, improve search engine rankings, and ultimately drive more conversions. Embracing this technology represents a strategic investment in the future of your online presence, ensuring reliability, scalability, and unparalleled speed for your website.

  • Sign Up with cPanel Linux Hosting | Learn About Its Functionalities & Uses

    Sign Up with cPanel Linux Hosting | Learn About Its Functionalities & Uses

    cPanel is a widely used control panel in web development and hosting industries. It eliminates the need for technical expertise, allowing users to manage their web hosting tasks with ease. Its intuitive interface and beginner-friendly dashboard make it easy to use. This blog will explain cPanel Linux Hosting.

    cPanel is a user-friendly control panel that simplifies web hosting for non-technical users. It’s often paired with Web Host Manager (WHM) for website management but serves a different function. Web hosting providers use WHM to operate website servers, while cPanel helps manage website administration. It offers file management, MySQL, software installation, database search, analytics, and more features. Most shared hosting plans come with cPanel, and it’s compatible with advanced hosting solutions like dedicated servers, cloud hosting, cPanel Linux Hosting, and managed WordPress hosting plans.

    It is a Linux-based hosting solution that has a pre-installed cPanel as a control panel. Hosting providers use WHM for managing servers and creating cPanel accounts for their customers. Website owners prefer cPanel hosting as it eliminates the need to hire a professional web developer. Users with minimal technical expertise can easily manage their website’s data using cPanel.

    cPanel Linux Hosting is highly intuitive and user-friendly. It offers a wide range of tools for easy file and email management, database handling, high-security features, and more. It is scalable, affordable, and reliable, and readily integrates with various themes and plugins for customization.

    Access and Effective Utilization

    To access the cPanel dashboard allocated for your website, there are two main methods. The first uses a direct link, while the second uses a browser.

    Direct Link:

    Linux Hosting provider often provides their users with a direct link in their welcome email after they purchase their plans. To find the direct link, just search for the welcome email you received from the service provider. Once you locate the direct link in the email, click it to be redirected to the cPanel dashboard.

    Using A Browser:

    To access the cPanel dashboard using a browser, type your website’s URL in the address bar of your web browser.

    Enter your cPanel username and password. Usually, the credentials are included in your welcome email. (If you can’t find them, contact your web hosting’s support.)

    Click the “Log in” button.

    Access the Dashboard

    Once you’re logged in successfully, you’ll be taken to the cPanel dashboard, where you can manage various aspects of your website, including files, emails, databases, and more.

    cPanel Dashboard

    After logging in to cPanel Linux Hosting, the dashboard shows the main sections and features. The dashboard and features may vary from provider to provider, but most have a general category. Let’s take a look at each feature.

    Files

    This section is for file management and includes options to upload, download, manage, and edit files on your website. You can also create and restore backups of your website and files, and check your disk usage.

    Softaculous App Installer

    This section is essential for website management. Major options include easy installation of popular web applications like WordPress, Joomla, and Drupal, a website builder for basic sites, subdomains for different projects, and addon domains for hosting multiple sites on one account.

    Email

    This section within the cPanel Linux Hosting dashboard is designated as the Email section, and its purpose is the management of all email-related tasks. The section includes an array of features: –

    Email Accounts: You can create and manage email accounts for your domains.

    Forwarders: You can set up email forwarding to other addresses.

    Autoresponders: This feature enables you to manage and send automatic responses to incoming emails.

    Spam Filters: The built-in configuration of spam filters safeguards and organizes your inbox for you.

    Databases

    The database section has two options:

    1. MySQL Databases: create and manage website databases with MySQL.

    2. phpMyAdmin: manage databases with a graphical interface.

    Security

    cPanel Linux Hosting offers a range of security features to keep your website protected. You can install SSL/TLS certificates for secure browsing, block IP addresses, protect against unauthorized file downloads, and configure various security settings.

    It offers several features including Metrics for resource usage statistics, Software for easy installation and management of applications, and Preferences for customization options.

    The cPanel Way To Install WordPress

    cPanel Linux Hosting is a popular tool for managing WordPress CMS. There are two ways to install WordPress from cPanel: Softaculous for beginners and the manual method for advanced users. To install WordPress via Softaculous, log in to your cPanel account, go to Software > Softaculous Apps Installer, search for “WordPress,” and follow the instructions. For the manual method, download WordPress from WordPress.org, create a database and user in cPanel, upload WordPress files to your server, edit the wp-config.php file, run the installation script, and you’re done. We hope this guide helps you install WordPress effortlessly with cPanel Linux Hosting.

    Exploring cPanel’s Functions: Understanding Its Purpose

    ccPanel is a tool that streamlines website management tasks. Once you log in to the dashboard, you can manage website files, create email accounts, install software, enable Cloudflare, update DNS records, monitor site metrics, configure security layers, and activate cron jobs. These tasks are completed from various sections of the cPanel dashboard.

    cPanel Linux Hosting is a user-friendly web hosting control panel that simplifies website management. It offers a robust set of features suitable for small and large websites alike and is both secure and reliable.

    Conclusion

    In conclusion, cPanel Linux Hosting offers a robust and user-friendly platform for managing websites and online projects. Its functionalities are diverse and cater to both beginners and advanced users alike. From easy installation of popular applications to efficient management of email accounts and databases, cPanel simplifies the often complex tasks associated with web hosting.

    With its intuitive interface and comprehensive features, cPanel empowers users to take control of their web hosting experience. Whether it’s setting up domains, managing files, or monitoring website performance, cPanel provides the tools necessary to streamline these processes.

    Moreover, its compatibility with Linux servers ensures stability, security, and scalability, making it a preferred choice for hosting providers and website owners worldwide. Overall, cPanel Linux Hosting stands as a reliable solution for anyone seeking a powerful and user-friendly platform to host their websites and online projects.

  • Docker UbuntuOS Linux VPS Server

    Docker UbuntuOS Linux VPS Server

    Overview Of Installing and How to Use Docker on Ubuntu in Linux VPS Server

    Docker serves as an open-source platform tailored for the development, transportation, and execution of applications on Ubuntu OS in Linux VPS Server. Its primary objective is to simplify the process of creating, deploying, and running applications through the utilization of containers. By leveraging Docker, developers can encapsulate their applications into standardized units known as containers, enabling them to run seamlessly on any computer, regardless of the underlying operating system or hardware.

    The platform facilitates the rapid and straightforward deployment of applications within a uniform environment, alleviating concerns about the intricacies of the infrastructure. Docker also offers an extensive array of tools and services for effectively managing and monitoring applications. Additionally, it provides features for constructing and sharing images collaboratively among developers. Recognized as an indispensable tool in modern software development, Docker is widely adopted by some of the world’s leading companies.

    This tutorial guides you through the installation and utilization of Docker Community Edition (CE) on Ubuntu 22.04 in Linux VPS Server.

    Requirements

    Familiarity with the Linux command line is essential. You need an Ubuntu 22.04 Linux VPS Server with a non-root user possessing sudo privileges. You can acquire an affordable and potent Ubuntu Linux VPS Server from our website. Refer to our “How to access your server using SSH” guide for instructions on accessing your server and establishing a sudo user.

    Updating Package Cache and Installing Necessary Packages

    Start by updating the packages in the package manager cache to the latest available versions using the following command:

     sudo apt update

    Next, install a few packages that will allow us to use apt with HTTPS in order to add the official docker repository and get the latest version of Docker. To do this, run the following command:

    sudo apt -y install apt-transport-https ca-certificates curl software-properties-common
    

    Installing Docker

    We will use the official Docker repository to install the latest version of Docker. First, add the GPG key for the official Docker repository to your system:

    curl -fsSL https://download.docker.com/linux/ubuntu/gpg | sudo gpg --dearmor -o /usr/share/keyrings/docker-archive-keyring.gpg
    

    Next, add the official Docker repository to your APT sources:

    echo "deb [arch=$(dpkg --print-architecture) signed-by=/usr/share/keyrings/docker-archive-keyring.gpg] https://download.docker.com/linux/ubuntu $(lsb_release -cs) stable" | sudo tee /etc/apt/sources.list.d/docker.list > /dev/null
    

    Update your package index:

    sudo apt update
    

    Now, with the repository added, install the docker-ce package, which is the Docker Community Edition package:

    sudo apt install docker-ce
    

    Once the installation finishes, check that Docker is running:

    sudo systemctl status docker
    

    You should receive output indicating that Docker is active and running, similar to the following:

    • docker.service – Docker Application Container Engine
    Loaded: loaded (/lib/systemd/system/docker.service; enabled; vendor preset: enabled)
         Active: active (running) since Sun 2022-12-18 13:50:49 UTC; 32s ago
    TriggeredBy: ● docker.socket
           Docs: https://docs.docker.com
       Main PID: 323716 (dockerd)
          Tasks: 9
         Memory: 24.4M
            CPU: 429ms
         CGroup: /system.slice/docker.service
                 └─323716 /usr/bin/dockerd -H fd://-containerd=/run/containerd/containerd.sock
    

    Using Docker

    With docker installed, you can now use it to manage Docker images.

    To see all available docker subcommands, run the following command:

    docker

    You should receive a list of docker subcommands and a brief description for each one.

    You can use the syntax docker COMMAND –help to get more information on a specific subcommand. For example, to get more information on the docker rm command, you can use the –help flag as follows:

    docker rm --help
    

    You should receive output similar to the following:

    Usage:  docker rm [OPTIONS] CONTAINER [CONTAINER...]
    Remove one or more containers
    Options:
     -f, --force     Force the removal of a running container (uses SIGKILL)
      -l, --link      Remove the specified link
      -v, --volumes   Remove anonymous volumes associated with the container
    

    To view general information on your Docker installation, use docker info like so:

    sudo docker info

    This will show you information on your Docker configuration and Linux VPS Server properties.

    Downloading a Docker Image from Docker Hub:

    It is a cloud-based service that provides a centralized repository for Docker images. It allows users to store, manage, and share Docker images with other users. It provides a secure and reliable way to share and store Docker images, which can be used to create and deploy applications. Docker Hub also provides a wide range of services, such as private repositories, automated builds, and integration with other services.

    To test whether you can access Docker Hub, run the hello-world image:

    sudo docker run hello-world

    You should receive an output that shows that your installation is working correctly:

    Unable to find image 'hello-world:latest' locally
    latest: Pulling from library/hello-world
    2db29710123e: Pull complete 
    Digest: sha256:c77be1d3a47d0caf71a82dd893ee61ce01f32fc758031a6ec4cf1389248bb833Status: Downloaded newer image for hello-world:latest
    Hello from Docker!
    This message shows that your installation appears to be working correctly.

    You can use the docker search command to search for images hosted on Docker Hub like so:

    sudo docker search ubuntu

    Here, you search for the Linux VPS Server Ubuntu image. You should see a list of results like so:

    NAME                             DESCRIPTION                                     STARS     OFFICIAL   AUTOMATED
    ubuntu                           Ubuntu is a Debian-based Linux operating sys…   15357     [OK]       
    websphere-liberty                WebSphere Liberty multi-architecture images …   290       [OK]       
    ubuntu-upstart                   DEPRECATED, as is Upstart (find other proces…   112       [OK]       
    neurodebian                      NeuroDebian provides neuroscience research s…   97        [OK]       
    ubuntu/nginx                     Nginx, a high-performance reverse proxy & we…   71                   
    

    Images that are officially maintained and supported are labeled as [OK] under the OFFICIAL column.

    In the results above, you see that ubuntu is the name of the official Ubuntu image. You can download it using the docker pull command like so:

    sudo docker pull ubuntu                   
    

    You should receive the following output:

    Using default tag: latest
    latest: Pulling from library/ubuntu
    6e3729cf69e0: Pull complete 
    Digest: sha256:sha256:27cb6e6ccef575a4698b66f5de06c7ecd61589132d5a91d098f7f3f9285415a9
    Status: Downloaded newer image for ubuntu:latest
    docker.io/library/ubuntu:latest              
    

    You can list the images you’ve downloaded so far using the following command:

    sudo docker images
    

    You should see ubuntu and hello-world like so:

    REPOSITORY    TAG       IMAGE ID       CREATED         SIZE
    ubuntu        latest    6b7dfa7e8fdb   9 days ago      77.8MB
    hello-world   latest    feb5d9fea6a5   15 months ago   13.3kB
    

    The reason the image hello-world was downloaded, is that the docker run command either runs a container using an image if it has been downloaded, or downloads the image and then runs a container using it.

    Running a Docker Container:

    Docker containers can be run to perform a task in an isolated environment, just like running the hello-world container performs the task of printing a message. However, containers can also be interactive.

    For example, you can run a container using the Ubuntu image you’ve downloaded previously with an interactive shell using the docker run, and then -it switches:

    sudo docker run -it ubuntu
    

    Your prompt should now be a root shell like so:

    root@242d22e1d9da:/#
    

    This is the root user of your Linux VPS Server Ubuntu container, and you can now manage it just like a virtual machine.

    With this shell prompt, you can run any command inside your Ubuntu container. For example, you can update the package index inside the container using apt update like so:

    root@242d22e1d9da:/# apt update
    

    You can also install any application or package using apt install. For example, you can install Python 3 like so:

    root@242d22e1d9da:/# apt install python3
    

    Once the installation finishes, you can run Python like so:

    root@242d22e1d9da:/# python3
    

    This should allow you to access the Python REPL inside your Ubuntu container:

    Python 3.10.6 (main, Nov 14 2022, 16:10:14) [GCC 11.3.0] on linux
    Type "help", "copyright", "credits" or "license" for more information.
    >>>
    

    With this, you can run programs and modify your container in an environment that is isolated from the rest of your Linux VPS Server.

    Congratulations!

    You’ve successfully installed Docker on your system and acquired the skills to explore Docker images in the official Docker Hub, download an image, and utilize it for a container. Additionally, you’ve gained knowledge on running the container’s shell, managing its packages, and installing programs. For more in-depth information on Docker, refer to the Docker guides.